
Viewing and finding items
Twenty items fit on a screen; two hundred don’t. This page is about getting to the one you want — searching, sorting, grouping — and about acting on many at once.
Searching
Section titled “Searching”Tap the magnifier in the toolbar and type. InvenDo searches product names, descriptions and barcodes; every word you type has to match, so “milk 3” finds “Milk 3.2%” but not milk with “3 packs” in its description. Results appear as you type; the list says No items yet when nothing matches.
- Tap the microphone to say the name instead. The first time, allow InvenDo to use the microphone.
- Tap the barcode icon to scan a pack and jump straight to it (not on the web).
The search stays on while you switch tabs or open a storage place; tap the magnifier again to close it and clear the term.
View Options
Section titled “View Options”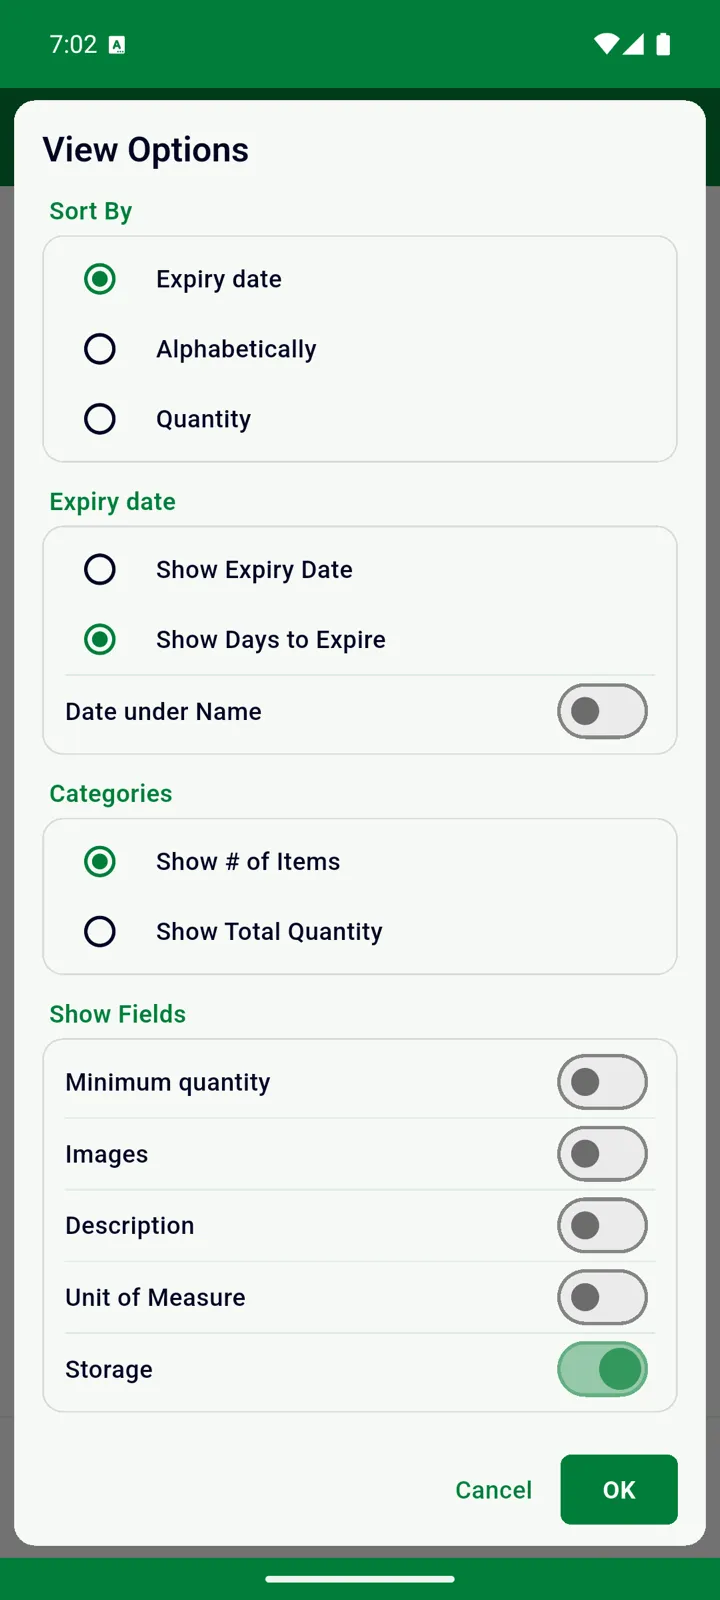
⋮ → View Options is where you decide what the list looks like. Choices apply to the list you’re in — a second list can look different — and they follow you to your other devices.
| Section | Choices |
|---|---|
| Sort By | Expiry date (soonest first; items without a date last), Alphabetically, or Quantity (largest first). |
| Expiry date | Show Expiry Date or Show Days to Expire — “5 Days”, or “-3 Days” once it’s past. Date under Name gives the date its own line. |
| Categories | Whether category headers count items (Show # of Items) or add up quantities (Show Total Quantity — whole numbers only, whatever the units). |
| Show Fields | Which extras each row shows: Minimum quantity, Images, Description, Unit of Measure, Storage. |
Tap OK to apply. The Storage row is only offered while you’re not grouping by storage place — otherwise you’d see the name twice.
Grouping
Section titled “Grouping”Two toolbar buttons decide how the Inventory is laid out, and you can combine them:
- Categories on: items sit under expandable category headers, subcategories nested inside. Tap a header to expand or collapse it; InvenDo remembers which ones you left open.
- Storages on: your top-level storage places appear as tiles, with items that have no place below them. Tap a tile to step inside; the trail above the list shows where you are, and the house icon takes you back.
- Both off: one flat list, in the order you chose under Sort By.
These two buttons are remembered per device, unlike View Options.
Each row shows the quantity and unit, the expiry date or days left with its colour bar, and — when switched on under Show Fields — the storage place, description and photo. A red min badge means the product is below its minimum; Opened means what it says. Category and storage headers carry counters: green for items that are fine, orange for those expiring within the week, red for expired.
Selecting several items
Section titled “Selecting several items”Tap the Select items icon at the left of the toolbar. Each row gets a checkbox; the tick-all button in the toolbar selects everything currently visible, or clears the selection. Once something is selected, the bottom bar offers:
- Inventory: Move to another storage place, Need to Buy (put them all on the Shopping List), Delete.
- Shopping List: Move to Inventory, Delete.
Deleting asks for confirmation. Tap the back arrow, or switch tabs, to leave selection mode.
Good to know
Section titled “Good to know”- Storage places, stores and category names aren’t searched — only what’s on the product itself.
- There’s nothing to pull down to refresh: the list updates by itself as changes arrive from your other devices.
- Sorting isn’t available on the Shopping List tab; there, items still to buy come first, alphabetically, then the crossed-off ones. See Using the Shopping List.
Still need help? Contact us