
Configura tu primera lista
InvenDo es más útil cuando su estructura refleja tu casa: los sitios donde miras de verdad y el tipo de cosas que guardas en ellos. Si elegiste Añadir ejemplos en el primer arranque, ya tienes una estructura inicial razonable — cuatro lugares de almacenamiento y ocho categorías — y puedes saltar al paso 5. Si empezaste vacío, esta página monta una en unos diez minutos.
Todo lo de abajo está en el menú ☰ → Gestionar y se aplica a la lista en la que estás. Consulta Gestionar: descripción general para ver el mapa completo.
1. Desactiva lo que no vayas a usar
Sección titulada «1. Desactiva lo que no vayas a usar»Abre Gestionar → Funciones y campos. Al principio todas las funciones están activadas; desmarca las que no necesites y sus campos desaparecen de todos los formularios, lo que hace más rápido añadir artículos:
- Tiendas y Precio — si no piensas usar la Lista de Compras para controlar el gasto.
- Unidad de medida — si te basta con “3” y nunca necesitas “3 kg”.
- Cantidad Mínima — si no quieres recordatorios de baja cantidad.
- Fecha de caducidad (y Duración tras la apertura, debajo) — si esta lista guarda cosas como herramientas o ropa.
Puedes volver a activar cualquiera más adelante. Consulta Funciones y campos.
2. Crea tus lugares de almacenamiento
Sección titulada «2. Crea tus lugares de almacenamiento»-
Abre Gestionar → Almacenajes y toca +.
-
Escribe el nombre en Almacenaje, elige un color y toca ✓. Los iconos y las fotos son extras Premium.
-
Para un lugar dentro de otro — un estante en el garaje, un cajón en la nevera —, abre primero el lugar que lo contiene y luego toca +.
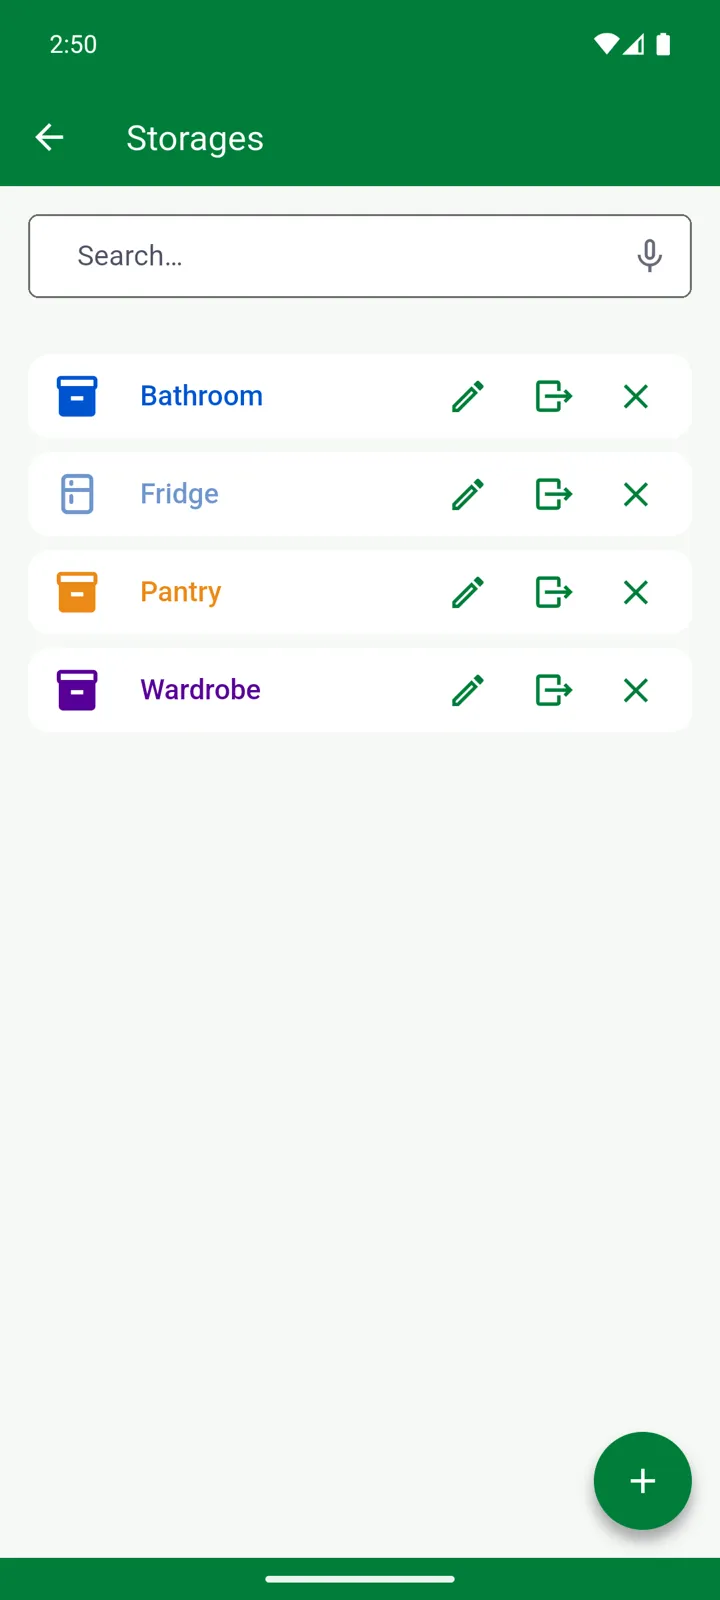
Empieza por los sitios que enumerarías si alguien te preguntara dónde están las cosas: Nevera, Congelador, Despensa, Baño, Armario, quizá Garaje. Cuantos menos, mejor; siempre puedes añadir un cajón más adelante. Consulta Lugares de almacenamiento.
3. Crea tus categorías
Sección titulada «3. Crea tus categorías»-
Abre Gestionar → Categorías y toca +.
-
Escribe el nombre, elige un color y toca ✓.
-
En Campos activados, desmarca lo que no tenga sentido para ese tipo de cosas — la Fecha de caducidad para Ropa, por ejemplo — y esos artículos tendrán un formulario más corto.
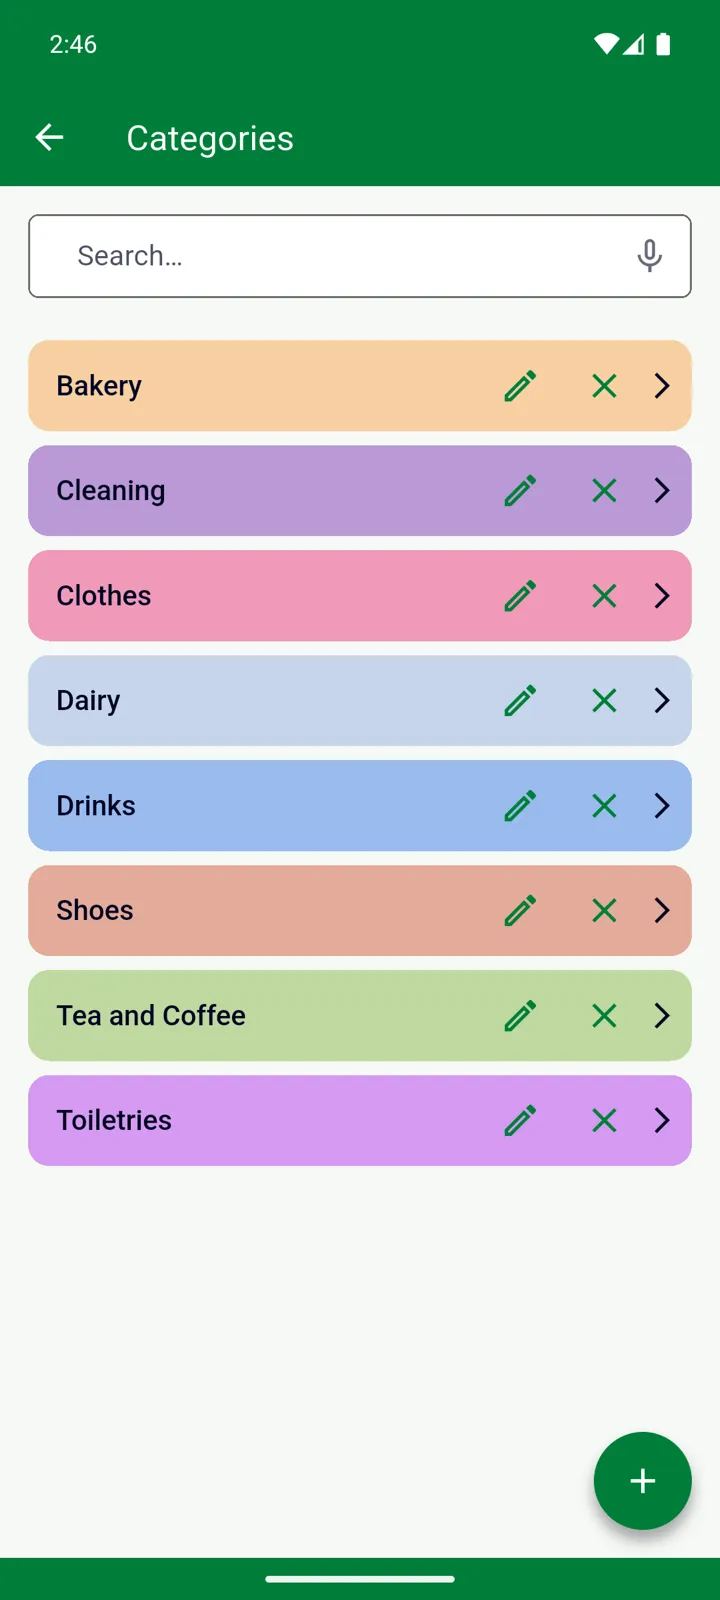
Las categorías amplias funcionan mejor: el juego de ejemplo es Lácteos, Bebidas, Té y café, Panadería, Aseo personal, Limpieza, Ropa y Zapatos. Las subcategorías llegan a dos niveles gratis, y a cinco con Premium. Consulta Categorías.
4. Revisa tus unidades
Sección titulada «4. Revisa tus unidades»Gestionar → Unidad de medida empieza con uds., paq., kg, g, L y ml. Añade lo que uses — botella, rollo, bolsa — con +, y borra el resto si quieres. Los artículos no tienen por qué llevar unidad: elige Ninguna al añadirlos. Consulta Unidades y tamaño de unidad.
5. Añade tiendas (opcional)
Sección titulada «5. Añade tiendas (opcional)»Si compras en más de un sitio, añade cada uno en Gestionar → Tiendas — solo un nombre. Asigna a los artículos una tienda preferida y la Lista de Compras podrá agruparse por tienda, para que veas qué comprar en cada sitio. Consulta Tiendas.
6. Empieza a añadir artículos — y deja que la app haga el resto
Sección titulada «6. Empieza a añadir artículos — y deja que la app haga el resto»No hace falta terminar la estructura primero. Cuando añades un artículo, los selectores de categoría y de almacenaje incluyen un + para crear una categoría o un lugar nuevos allí mismo, e InvenDo rellena de antemano la categoría y el lugar de almacenamiento que usaste la última vez. Consulta Primeros pasos para tu primer artículo y Escanear códigos de barras para la forma más rápida de añadir productos envasados.
La estructura de ejemplo, por si quieres recrearla
Sección titulada «La estructura de ejemplo, por si quieres recrearla»La pregunta ¿Añadir datos de ejemplo? solo aparece una vez y no se puede recuperar, pero la estructura que crea se monta a mano en un par de minutos:
| Lugar de almacenamiento | Categorías | Artículos de ejemplo |
|---|---|---|
| Nevera | Lácteos, Bebidas | Leche, Yogur, Mantequilla, Huevos · Zumo de naranja, Agua con gas |
| Despensa | Té y café, Panadería | Café, Té, Azúcar · Pan, Galletas |
| Baño | Aseo personal, Limpieza | Champú, Jabón, Pasta de dientes, Papel higiénico · Limpiador de baño, Esponja, Detergente para ropa |
| Armario | Ropa, Zapatos | Chaqueta de invierno, Impermeable · Zapatos marrones, Sandalias |
¿Aún necesitas ayuda? Contáctanos