
Using the Shopping List
The Shopping List tab is the other half of InvenDo: what you need to buy. Items get on it from your Inventory, from the low-stock screen or by hand; you cross them off in the shop; and when you’re home, one tap moves what you bought into your Inventory — quantity, storage place and expiry date included.
Putting things on the list
Section titled “Putting things on the list”- From your Inventory: tap the item and choose Need to Buy, say how many, and confirm. If it’s already on the list, the quantities are added together.
- From the low-stock screen: ⋮ → Low Quantity Items lists everything under its minimum, with a cart icon per item and an Add All to Shopping List button (Premium). See Minimum quantity and low stock.
- By hand: on the Shopping List tab, tap Add, type the name — InvenDo suggests products it already knows — and set the Quantity, a category, a preferred store, the Price and anything else you like. Tap ✓. The fields are the same as for Inventory items — see Adding and editing items.
- By barcode: tap Scan ” + ” on this tab and the item is added from the pack. See Scanning barcodes.
Reading the list
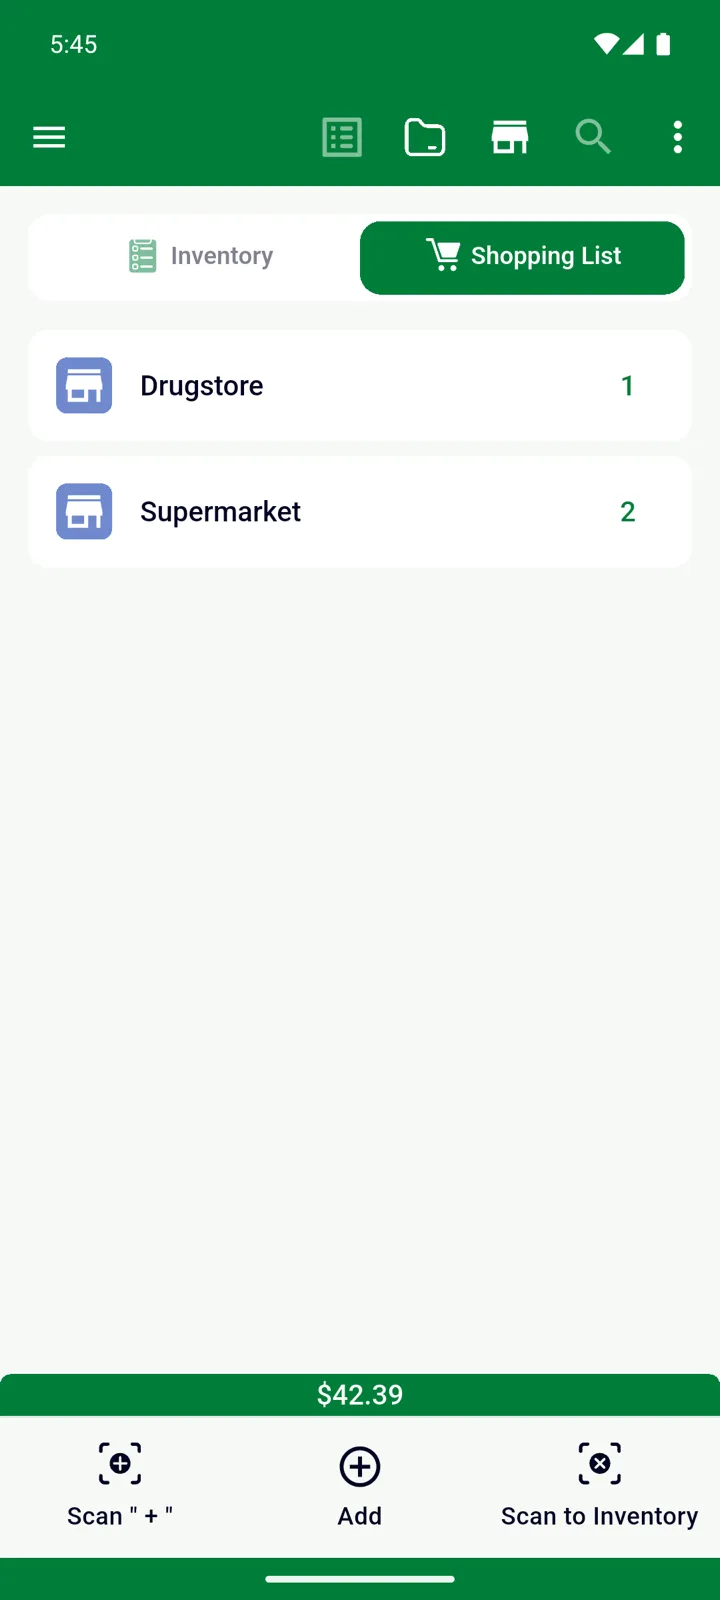
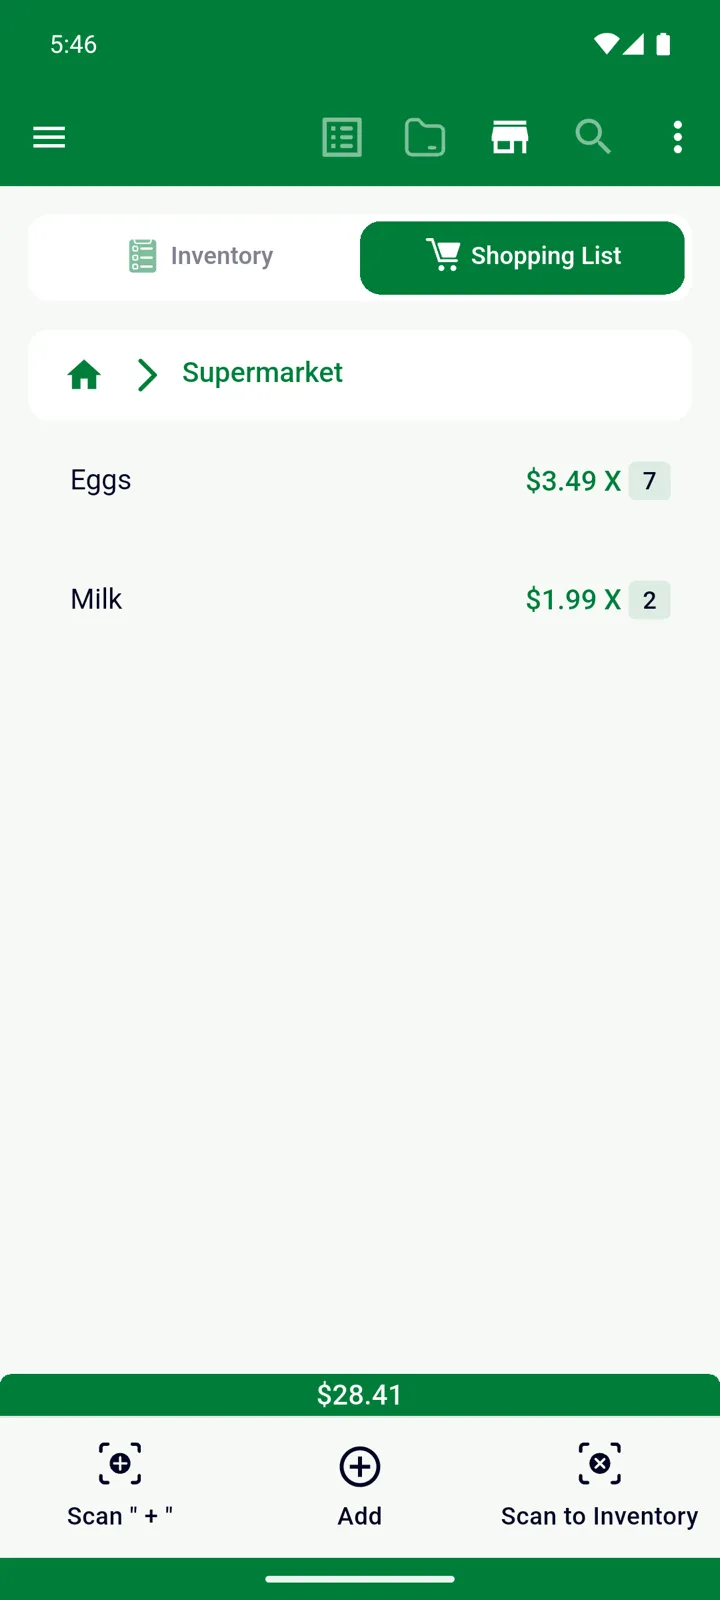
Section titled “Reading the list”Items are grouped by category. Tap the store icon in the toolbar to group by store instead: each store you’ve assigned items to becomes a row with a count — tap it to see just that store’s items, and tap the house icon to come back. Items without a store follow after the stores.
Each row shows the name, the price times the quantity, and the unit. A green total bar at the bottom adds up the prices of the items in view, in the currency chosen under Settings → General → Currency.
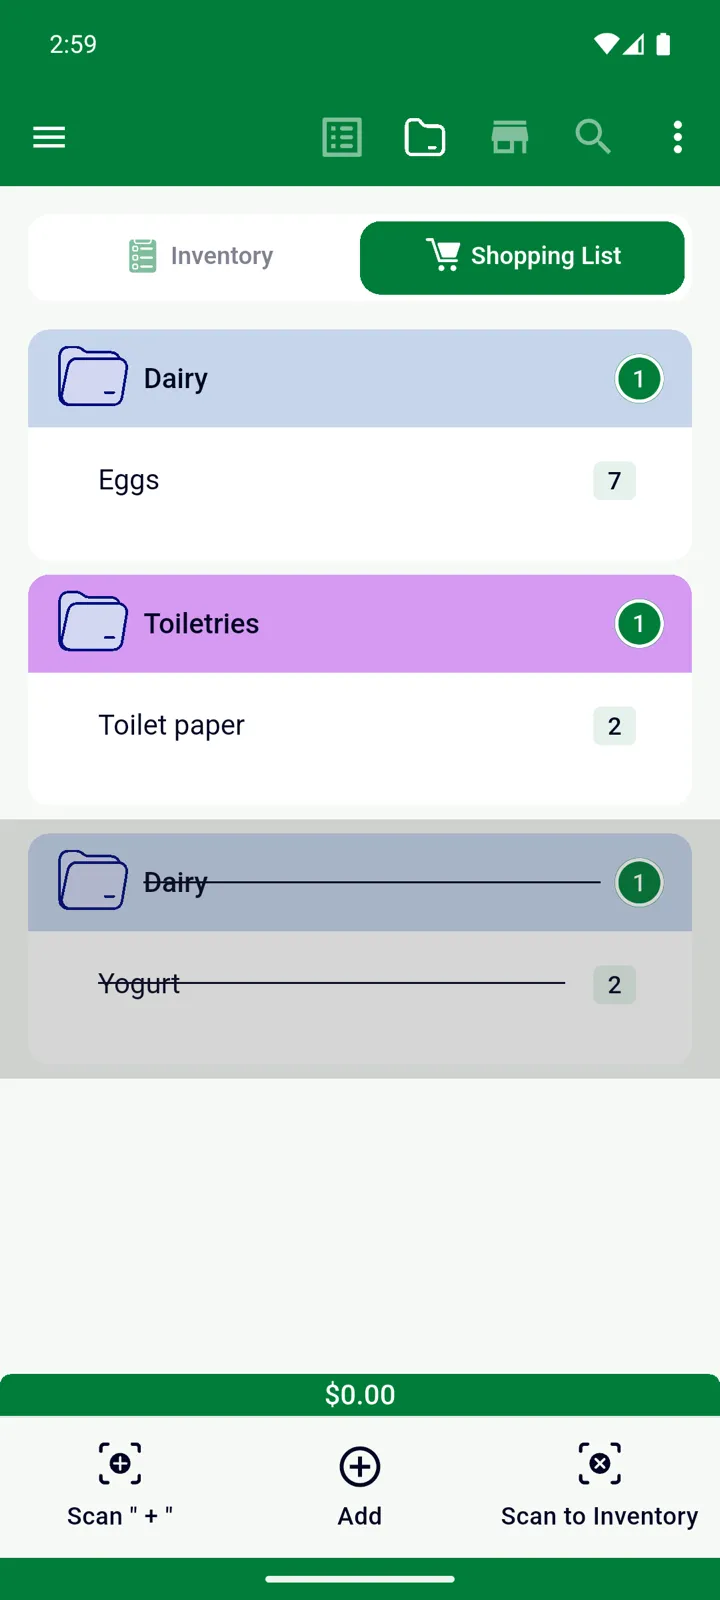
The order is fixed: things still to buy first, alphabetically, then the crossed-off ones. ⋮ → View Options lets you choose whether category headers show a count or a total quantity, and whether rows show Images, the Description and the Unit of Measure. See Viewing and finding items.
In the shop: crossing off
Section titled “In the shop: crossing off”Tap an item and choose Cross off — or just swipe the row to the right. It gets a line through it and moves down to the crossed-off items at the bottom of the list. Same gesture to bring it back. Crossed-off items stay on the list until you delete them or move them into your Inventory.
Back home: moving purchases into your Inventory
Section titled “Back home: moving purchases into your Inventory”-
Tap the item and choose Move to Inventory (or swipe the row to the left).
-
In the Add to Inventory dialog, check the Quantity — it starts at what was on the list — pick the Storage (InvenDo suggests where you keep most of that product) and, for food, enter the Expiry date.
-
Confirm.
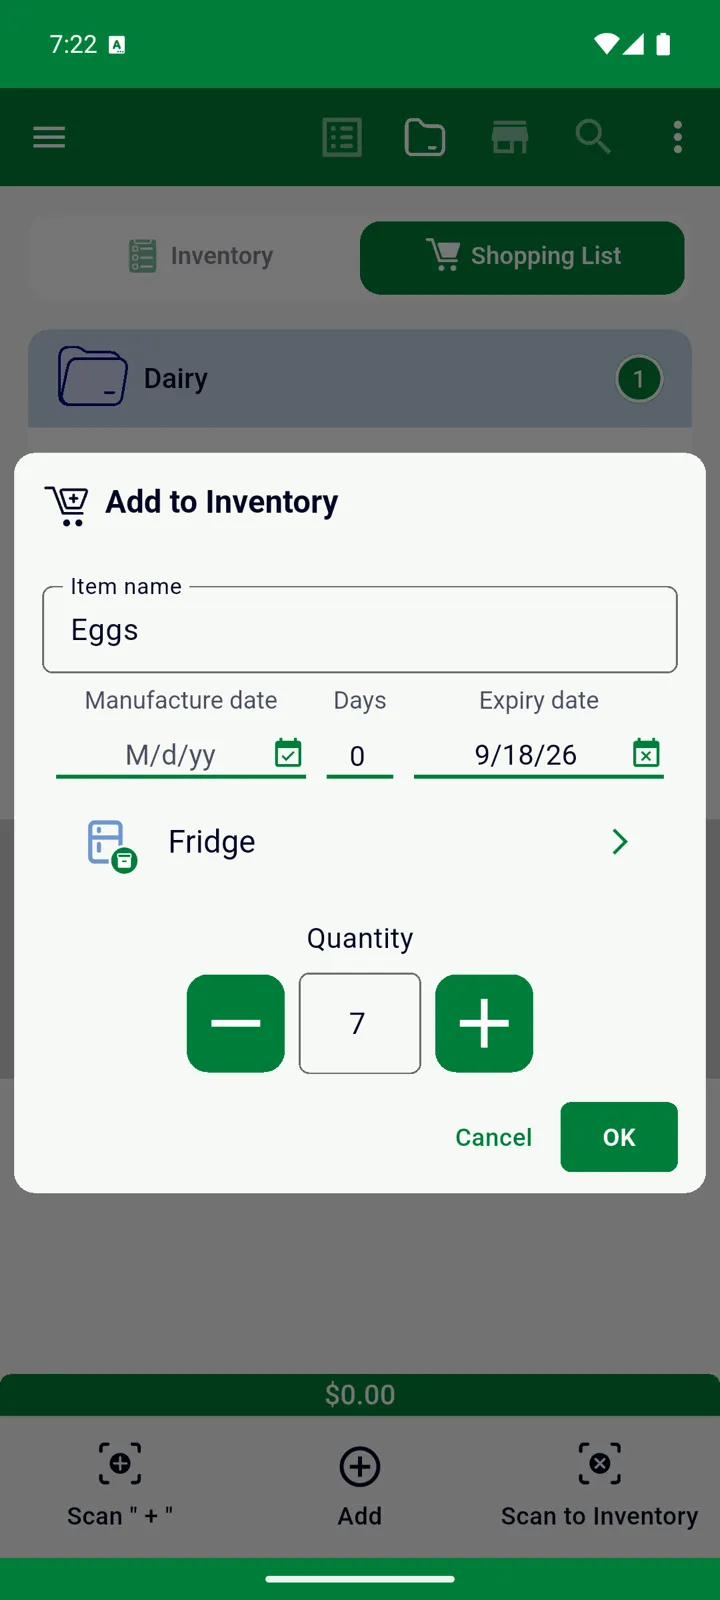
The amount you move is taken off the Shopping List; move all of it and the row disappears, move part and the rest stays. In your Inventory it joins an existing entry of the same product with the same dates in the same place, or becomes a new one.
Bought everything? Tap the Select items icon in the toolbar, tick the rows, and choose Move to Inventory — each item goes to its usual place in one go, without a dialog. Or scan each pack with Scan to Inventory.
Sharing the list as text
Section titled “Sharing the list as text”⋮ → Share List sends the list as plain text — names with quantities in brackets — to any app on your phone: a message, an email, a note. Inside a store, only that store’s items are included. This is a one-off copy; to work on the same list together, see Share with family.
Good to know
Section titled “Good to know”- On Android you can keep the Shopping List on your home screen and cross things off from there — see Android widget.
- The Price belongs to the product, not to this row: change it here and it changes everywhere that product appears.
- To remove something without buying it, tap it and choose Delete; for several at once, use Select items → Delete.
- The Delete items with zero quantity? switch in Features and Fields applies to the Inventory only; a Shopping List row at 0 stays until you delete it.
Still need help? Contact us