
Getting around
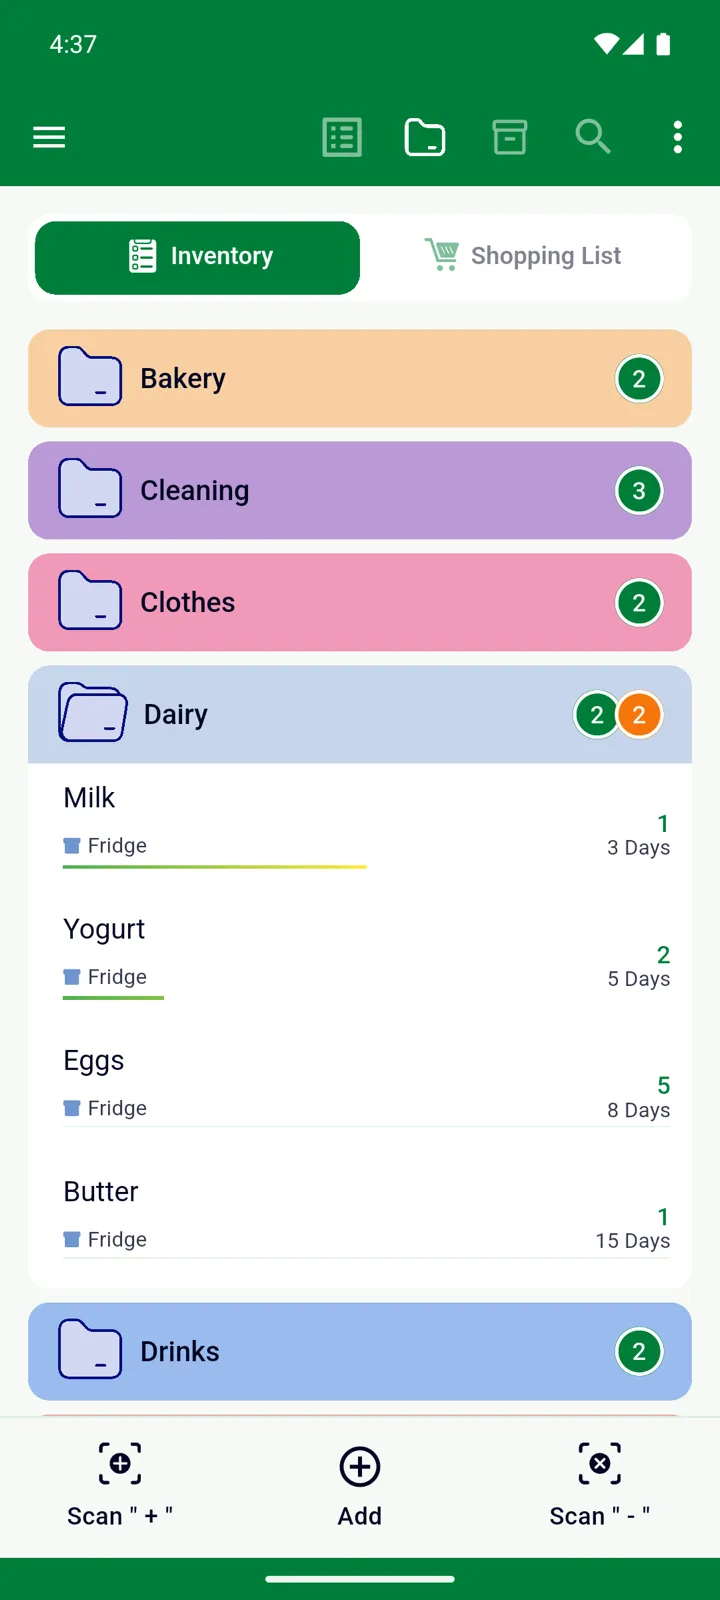
InvenDo opens on the main screen: two tabs, a toolbar above them and three big buttons below. Here’s what everything does.
The two tabs
Section titled “The two tabs”- Inventory — everything you have at home.
- Shopping List — what you need to buy. See Using the Shopping List.
Tap a tab or swipe between them. InvenDo remembers which one you were on.
What’s in the list
Section titled “What’s in the list”Items are grouped by category — tap a category to open it. On the Inventory tab you can group by storage place instead; on the Shopping List, by store. Tap a storage place or store to step into it; the breadcrumb above the list shows where you are, and the house icon takes you back to the top.
Category and storage headers carry small counters: green for items that are fine, orange for items expiring within the next week, red for expired ones.
Each item shows its quantity and, if it has one, its expiry date or the days left, with a colour bar that appears as the date approaches. A red min badge means the item is below its minimum quantity; an Opened badge means it has been opened.
The toolbar
Section titled “The toolbar”
Icons from left to right:
- Select items — tick several items and act on all of them at once (see below).
- Categories — show or hide the category grouping.
- Storages (Inventory) or Stores (Shopping List) — group by storage place or by store.
- Search — opens the search field.
- ⋮ menu — View Options, Share List (Shopping List only — sends the list as text), Low Quantity Items, Export to Excel and Import from Excel (Premium). See Excel export and import.
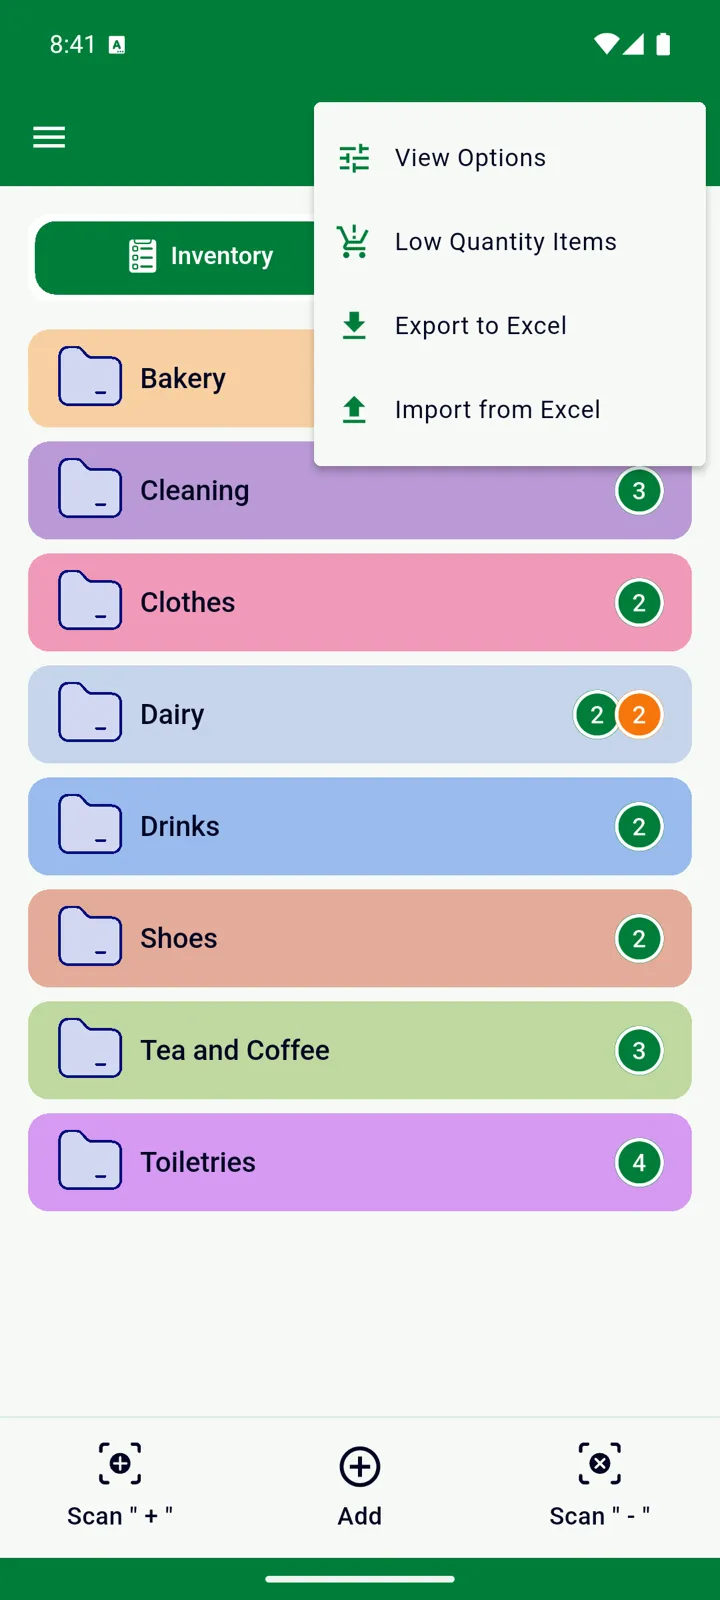
View Options is where you tailor the list: sort by expiry date, name or quantity; show the expiry date or the days left; show item counts or total quantities on category headers; and choose which fields appear on each item — minimum quantity, images, description, unit, storage.
Searching
Section titled “Searching”Tap the magnifier and start typing — InvenDo searches names, descriptions and barcodes as you type. Tap the microphone to say the name instead, or the barcode icon to scan the pack.
The bottom bar
Section titled “The bottom bar”- Scan ” + ” — scan a barcode to add an item to the tab you’re on.
- Add — add an item by hand. See Adding and editing items.
- Scan ” - ” (Inventory) — scan a barcode to take one out. On the Shopping List tab this button becomes Scan to Inventory, which moves a purchase into your Inventory.
See Scanning barcodes.
Tapping an item
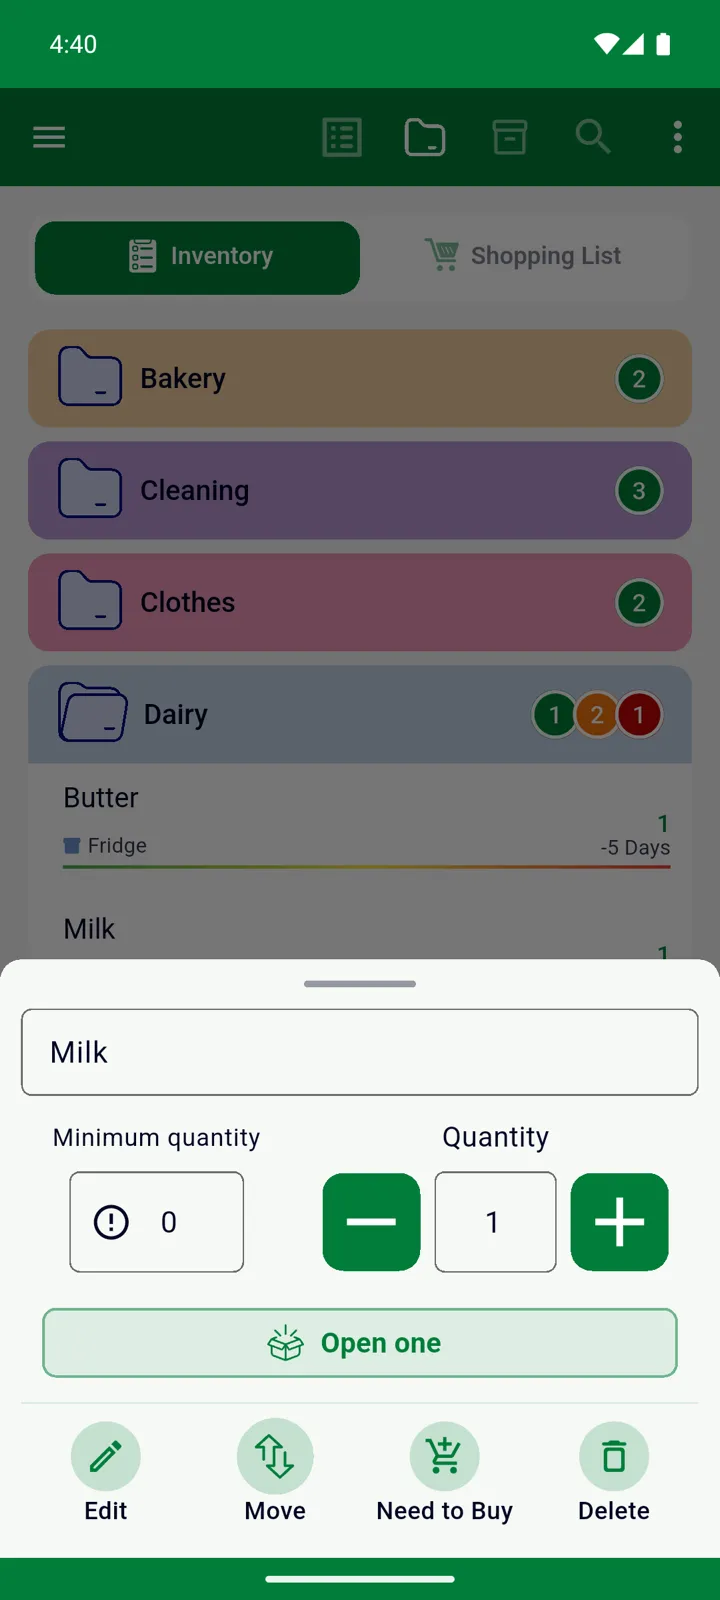
Section titled “Tapping an item”Tapping an item opens a quick panel where you can change the quantity and the dates, mark it as opened, and reach the actions:
- Inventory: Edit, Move (to another storage place), Need to Buy (put it on the Shopping List), Delete.
- Shopping List: Edit, Move to Inventory, Cross off, Delete.
Edit opens the full form with every field.
Selecting several items
Section titled “Selecting several items”Tap the Select items icon, tick the items, then use the buttons at the bottom: on the Inventory tab Move, Need to Buy and Delete; on the Shopping List Move to Inventory and Delete.
The menu ☰
Section titled “The menu ☰”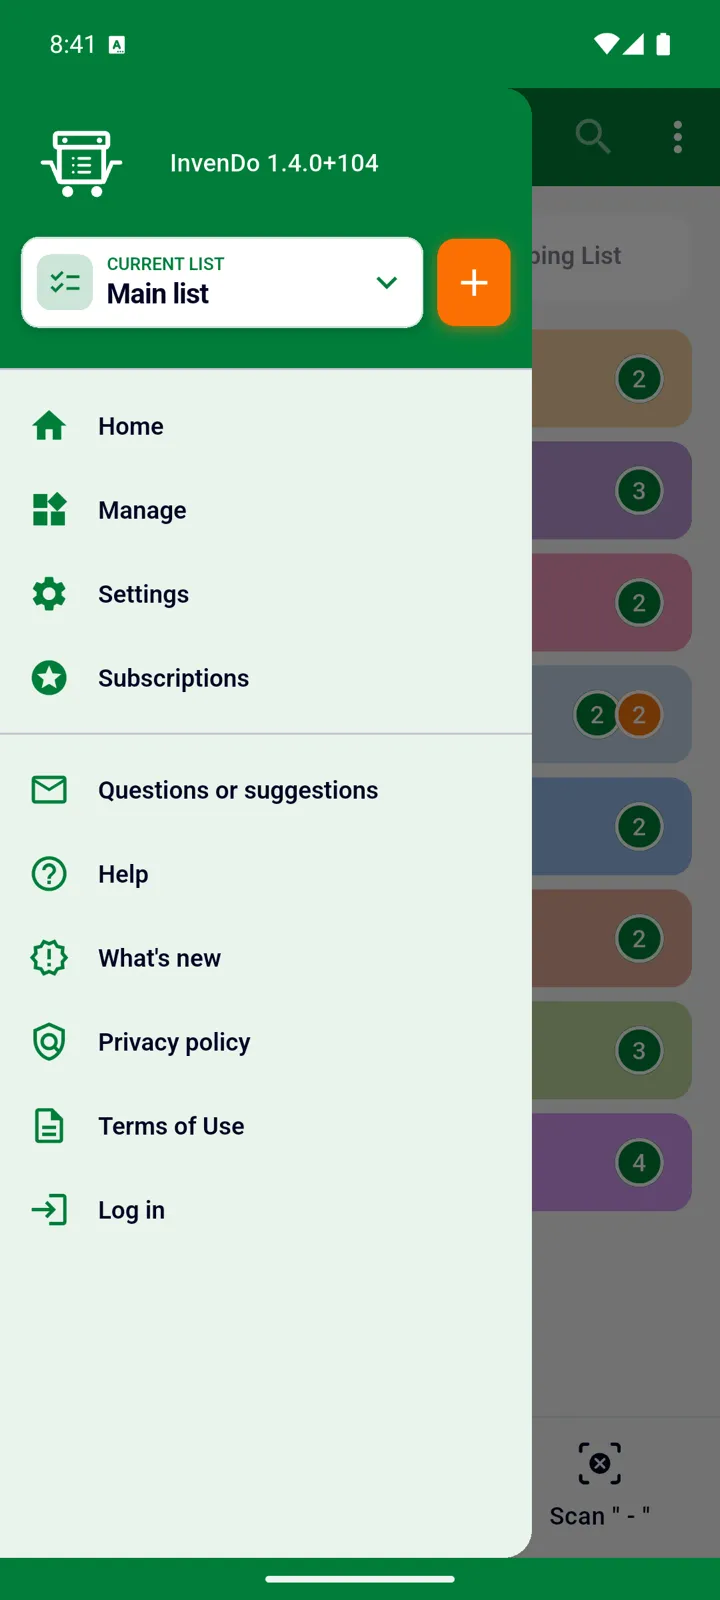
Tap the menu icon in the top-left corner:
- Current list — the list you’re working in. Tap it to switch lists; tap + to create a new one (Premium). See Multiple lists.
- Home — back to the main screen.
- Manage — how this list is organised: catalog, categories, storage places, stores, units, users and lists. See Manage overview.
- Settings — app preferences: theme, colour warnings, notifications, calendar style, currency, images, scanner, Excel columns and barcode lookup. See Settings overview.
- Subscriptions — your Premium plan. See Free vs Premium.
- Questions or suggestions — write to us from inside the app.
- Help — this site. What’s new — the release notes.
- Log in or Log out. See Accounts and sign-in.
In one sentence: Manage is about your data, Settings is about the app.
In the browser
Section titled “In the browser”The web version at web.invendo.app (Premium) has the same layout minus the camera: the bottom bar shows only Add, and there are no scan icons or notifications. See InvenDo on the web.
Still need help? Contact us